


How to Install a Custom Shape in Photoshop.
In this tutorial I will show you the methods through which you can install Photoshop custom shapes into your Photoshop. Custom shapes for Photoshop come in the form of CSH files and they can be imported into Photoshop after which they can be used for various purposes.
You can watch the video tutorial or the text version below. For any questions or remarks please contact shapesforphotoshop.com through our contact form.
What is a Custom Shape ?
So, this is the first time you decided to use a Custom-Shape and you haven't got a clue whatsoever about Photoshop shapes. I will tell you in a few words what a custom-shape is and how to install it in Photoshop.
From the beginning, I want you to know that custom-shapes are very useful Photoshop resources and can be used in many ways. So it's important not only to know how to use them properly, but it's also important to know how to create your own shapes.
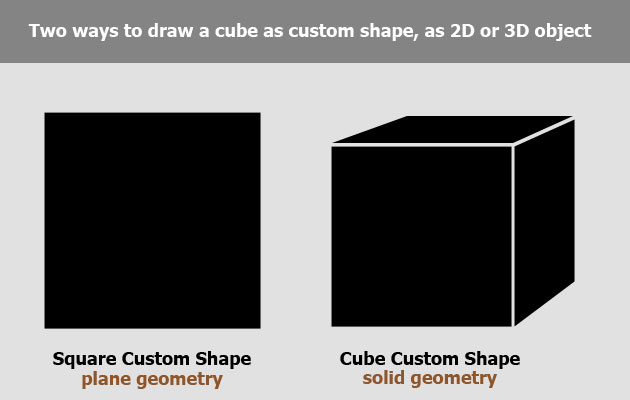
So, what is a Custom-Shape? We all know what a shape is, the space occupied by an object as determined by its external boundaries. There are the basic plane, two-dimensional geometry objects, as a set of two, or more points like: a line, a curve, or a plane figure (rectangles, circles, etcetera). We also have the solid three-dimensional geometry objects that are represented by a solid figure like a cube, or a sphere.
In Photoshop, a custom shape is a two dimensional object, that is defined only by its shape. So, you can see the custom shape as a silhouette of an object. It is not defined by color variations, texture, depth and so on, only shape. That doesn't mean that you can not simulate a 3D look for an object using 2D shapes. As you can see a cube can be represented as a rectangle(seen from the front) or as a cube(seen from one side). You will find further details in the section: "How to Create a Custom Shape?".
Photoshop comes with basic Custom Shape Tools like: the Rectangle Tool, the Ellipse Tool and - the Line Tool, that help you draw plane geometry objects. But, it also has a Custom Shape Tool where you can do the following:
- a. find - (all the Photoshop Versions come with a predefined list of custom shapes)
- b. upload - (upload and use custom shapes made by other people)
- c. create - (create other more complicated shapes and use them)
- d. save - (save one or more custom shapes as a CSH file)
How to Install a Custom Shape ?
Now let's talk about the three methods that allow you to install custom shapes in Photoshop.
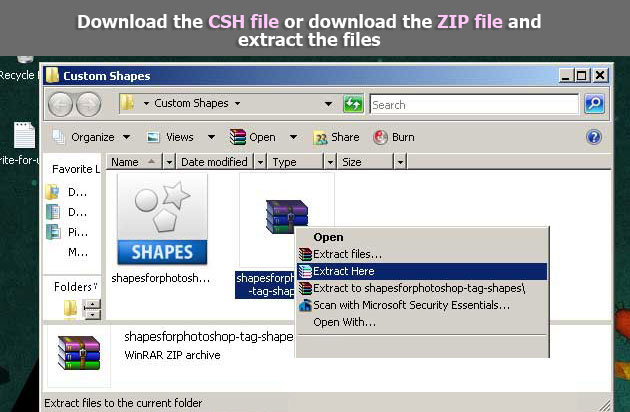
Let's say you found a custom shape set that you need and want to install it into Photoshop. There are three simple ways in which you can do it. But before talking about these three methods for installing custom shapes, first you have to download the file. A custom shape set is saved as CSH file. But many authors add a TXT file with license information, and archive the two files under the ZIP or RAR extensions for example. So download the CSH or ZIP file and save it on your computer. Very important, don't forget the path where you saved the file, you will need it later on. If it is an archive you have to extract the files from the archive because we can only load CSH files in Photoshop. Right click on the ZIP file and press Extract.
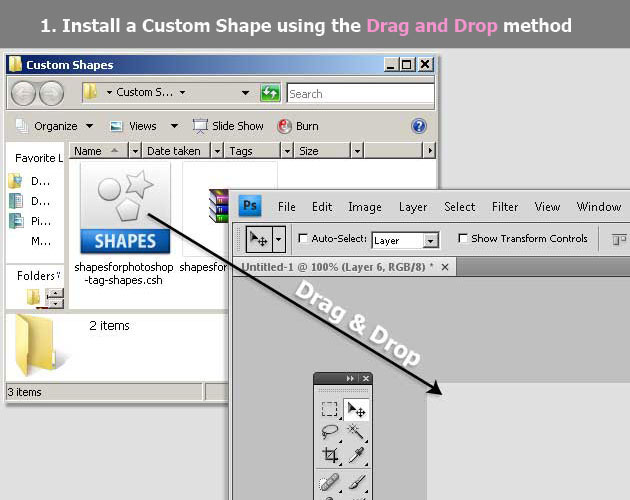
Method 1. Drag and Drop. The first method and also the easier one, to install the CSH file, is to open Photoshop, and, to simply drag and drop the custom shape file in Photoshop.
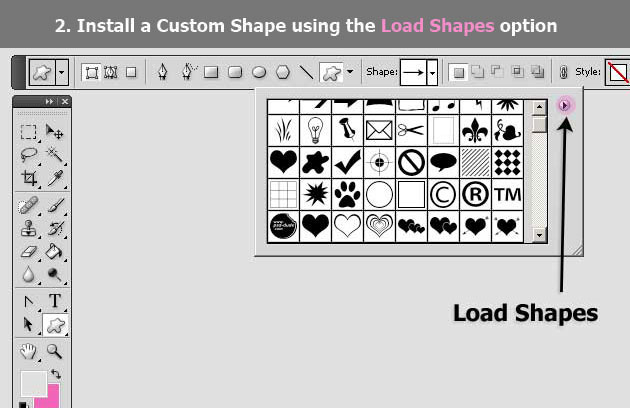
Method 2. Load the Shapes. The second method is to use the Load Shapes option from the Custom Shape Tool. Open the Custom Shape picker and you will see a small button to the right. Click it, and choose Load Shapes from the list. Be aware that Photoshop takes you to the predefined Custom Shapes Folder that is created on installing Photoshop. You have to go to the path where you saved your CSH file, and load it from there.
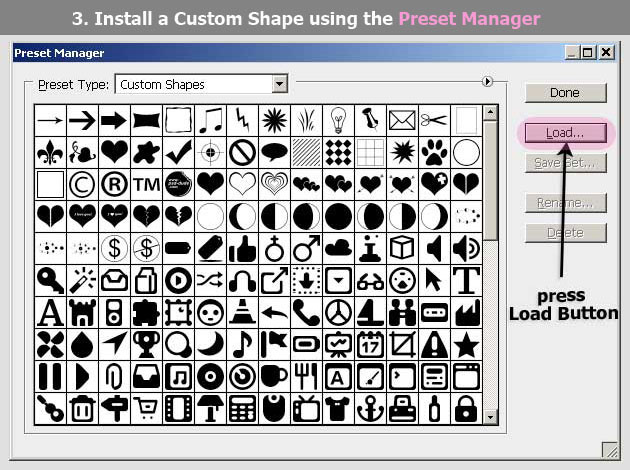
Method 3. The Preset Manager. Go to the Edit Menu, and, one of the submenus is the Preset Manager. This is actually a window where you can manage all the resources that Photoshop has installed. You can preview, load, save, or delete them. The resources include Brushes, Custom Shapes, Actions, and, so on. Using the drop-down list, you have to set the Preset Type to Custom Shapes. Then, use the Load button from the right side of the window. Again, go to the path where you have saved the CSH file that you want to install, and press Load.
All the three methods presented have the same result, which is, the installation of the CSH file in Photoshop. So, when you will open the Custom Shape picker, all the shapes will be in that list, ready to be used.